

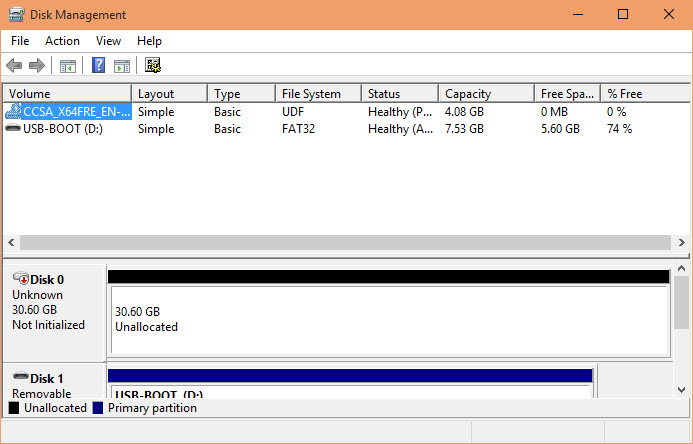
Giả sử tôi có một ổ đĩa trống 30 GB chưa định dạng gì như hình bên dưới.
Bước 1: Chạy CMD trong Windows 10 PE
Microsoft Windows [Version 10.0.10240]
(c) 2015 Microsoft Corporation. All rights reserved.
Bước 2: Tôi sử dụng lệnh DISKPART để quản lý ổ đĩa
X:\windows\system32>diskpart
Microsoft DiskPart version 10.0.10240
Copyright (C) 1999-2013 Microsoft Corporation.
On computer: Win10PE
Bước 3: Tôi dùng lệnh "list disk" kiểm tra trong Windows PE có mấy ổ đĩa và thứ tự các ổ
DISKPART> list disk
Disk ### Status Size Free Dyn Gpt
-------- ------------- ------- ------- --- ---
Disk 0 Online 30 GB 30 GB
Disk 1 Online 7728 MB 0 B
Bước 4: Tôi sử dụng lệnh "select disk 0" để chọn ổ đĩa 0
DISKPART> select disk 0
Disk 0 is now the selected disk.
Bước 5: chuyển ổ đĩa 0 sang GPT
DISKPART> convert gpt
DiskPart successfully converted the selected disk to GPT format.
Bước 6: Tôi tạo phân vùng EFI Boot dung lượng 100 MB
DISKPART> create partition efi size=100
DiskPart succeeded in creating the specified partition.
Định dạng cho phân vùng EFI "Fat32" và có nhãn là "System"
DISKPART> format quick fs=fat32 label="System"
100 percent completed
DiskPart successfully formatted the volume.
Đặt ký tự cho phân vùng EFI ví dụ là "S"
DISKPART> assign letter="S"
DiskPart successfully assigned the drive letter or mount point.
Bước 7: Tiếp theo tôi tạo một phân vùng MSR có kích thước 16 MB
DISKPART> create partition msr size=16
DiskPart succeeded in creating the specified partition.
Bước 8: Tôi tạo phân vùng tiếp theo có kích thước 20490 MB tương đương 20 GB, phân vùng này dùng để cài Windows 10.
DISKPART> create partition primary size=20490
DiskPart succeeded in creating the specified partition.
Định dạng phân vùng cài win NTFS lấy nhãn "Local Disk"
DISKPART> format quick fs=ntfs label="Local Disk"
100 percent completed
DiskPart successfully formatted the volume.
Đặt ký tự cho phân vùng cài win ví dụ là "W"
DISKPART> assign letter="W"
DiskPart successfully assigned the drive letter or mount point.
Bước 9: Tôi tạo phân vùng Recovery kích thước 450 MB
DISKPART> create partition primary size=450
DiskPart succeeded in creating the specified partition.
Định dạng phân vùng NTFS lấy nhãn "Recovery"
DISKPART> format quick fs=ntfs label="Recovery"
100 percent completed
DiskPart successfully formatted the volume.
Đặt ký tự cho phân vùng Recovery ví dụ là "K"
DISKPART> assign letter="K"
DiskPart successfully assigned the drive letter or mount point.
Bước 10: Đặt cho tất cả các phân vùng vừa tạo thuộc tính GPT
DISKPART> gpt attributes=0x8000000000000001
DiskPart successfully assigned the attributes to the selected GPT partition.
Bước 11: Sử dụng "list volume" kiểm tra các phân vùng vừa tạo.
DISKPART> list volume
Volume ### Ltr Label Fs Type Size Status Info
---------- --- ----------- ----- ---------- ------- --------- --------
Volume 0 E CCSA_X64FRE UDF DVD-ROM 4177 MB Healthy
Volume 1 D USB-BOOT FAT32 Removable 7727 MB Healthy
Volume 2 W Local Disk NTFS Partition 20 GB Healthy
Volume 3 S SYSTEM FAT32 Partition 100 MB Healthy Hidden
* Volume 4 K Recovery NTFS Partition 450 MB Healthy
Bước 12: Sử dụng lệnh "exit" để thoát trình quản lý diskpart
DISKPART> exit
Leaving DiskPart...
X:\windows\system32>
Như vậy tôi đã vừa tạo xong các phân vùng cần thiết, bước tiếp theo tôi gắn đĩa cài Windows 10 64 Bit vào máy nếu dùng ISO thì mount ra ổ ảo lưu ý ký tự ổ đĩa chứa bộ cài Windows 10.

Bước 13: Trong cmd tôi tiếp tục sử dụng lệnh sau để bung bộ cài ISO vào ổ cài Windows 10 mà tôi đã tạo ở bước 8.
X:\windows\system32>dism /Apply-Image /ImageFile:E:\sources\install.wim /Index:1 /ApplyDir:W:\
Deployment Image Servicing and Management tool
Version: 10.0.10240.16384
Applying image
[==========================100.0%==========================]
The operation completed successfully.
Bước 14: Add Boot vào phân vùng EFI
X:\windows\system32>W:\Windows\System32\bcdboot W:\Windows /s S:
Boot files successfully created.
Bước 15: Sử dụng lệnh sau để tạo thư mục Windows RE trong phân vùng Recovery
X:\windows\system32>md K:\Recovery\WindowsRE
Copy tập tin winre.wim vào thư mục Windows RE
X:\windows\system32>xcopy /h W:\Windows\System32\Recovery\Winre.wim K:\Recovery\WindowsRE\
W:\Windows\System32\Recovery\winre.wim
1 File(s) copied
Bước 16: Sử dụng lệnh "exit" thoát cmd và khởi động lại máy tính tiếp tục để Windows 10 cài đặt
X:\windows\system32>exit

Sau khi cài đặt Windows 10 xong boot vào desktop mở This PC ta sẽ có phân vùng cài Windows và phân vùng Recovery. Bước tiếp theo tôi tiếp tục sử dụng cmd đang ký và kích hoạt Windows RE và làm ẩn phân vùng Recovery đi

Bước 17: Chạy CMD bằng quyền admin trong Windows 10
Microsoft Windows [Version 10.0.14393]
(c) 2016 Microsoft Corporation. All rights reserved.
Bước 18: Đăng ký và kích hoạt Windows RE
C:\Windows\system32>C:\Windows\System32\Reagentc /Setreimage /Path F:\Recovery\WindowsRE /Target C:\Windows
REAGENTC.EXE: Windows RE is already enabled.
Bước 19: Kiểm tra thông tin Windows RE
C:\Windows\system32>C:\Windows\System32\Reagentc /Info /Target C:\Windows
Windows Recovery Environment (Windows RE) and system reset configuration
Information:
Windows RE status: Enabled
Windows RE location: \\?\GLOBALROOT\device\harddisk0\partition3\Recovery\WindowsRE
Boot Configuration Data (BCD) identifier: dde66d6b-71a3-11e6-8ec8-9459504122f7
Recovery image location:
Recovery image index: 0
Custom image location:
Custom image index: 0
REAGENTC.EXE: Operation Successful.
Bước 20: Sử dụng diskpart để set id và làm ẩn phân vùng Recovery
C:\Windows\system32>diskpart
Microsoft DiskPart version 10.0.14393.0
Copyright (C) 1999-2013 Microsoft Corporation.
On computer: DESKTOP-QQ853DB
DISKPART> list disk
Disk ### Status Size Free Dyn Gpt
-------- ------------- ------- ------- --- ---
Disk 0 Online 30 GB 10 GB *
DISKPART> select disk 0
Disk 0 is now the selected disk.
DISKPART> list volume
Volume ### Ltr Label Fs Type Size Status Info
---------- --- ----------- ----- ---------- ------- --------- --------
Volume 0 D DVD-ROM 0 B No Media
Volume 1 C Local Disk NTFS Partition 20 GB Healthy Boot
Volume 2 SYSTEM FAT32 Partition 100 MB Healthy System
Volume 3 F Recovery NTFS Partition 450 MB Healthy Hidden
DISKPART> select volume 3
Volume 3 is the selected volume.
DISKPART> set id="de94bba4-06d1-4d40-a16a-bfd50179d6ac"
DiskPart successfully set the partition ID.
DISKPART> Remove
DiskPart successfully removed the drive letter or mount point.
DISKPART> list volume
Volume ### Ltr Label Fs Type Size Status Info
---------- --- ----------- ----- ---------- ------- --------- --------
Volume 0 D DVD-ROM 0 B No Media
Volume 1 C Local Disk NTFS Partition 20 GB Healthy Boot
Volume 2 SYSTEM FAT32 Partition 100 MB Healthy System
Volume 3 Recovery NTFS Partition 450 MB Healthy Hidden
DISKPART> exit
Leaving DiskPart...
C:\Windows\system32>exit

Như vậy tôi đã vừa trình bày kỹ thuật Sử dụng CMD cài đặt Windows 10 trong Windows PE trên hệ thống UEFI Boot step by step và list đầy đủ trong cmd bạn có thể xem bên dưới.
Microsoft Windows [Version 10.0.10240]
(c) 2015 Microsoft Corporation. All rights reserved.
X:\windows\system32>diskpart
Microsoft DiskPart version 10.0.10240
Copyright (C) 1999-2013 Microsoft Corporation.
On computer: Win10PE
DISKPART> list disk
Disk ### Status Size Free Dyn Gpt
-------- ------------- ------- ------- --- ---
Disk 0 Online 30 GB 30 GB
Disk 1 Online 7728 MB 0 B
DISKPART> select disk 0
Disk 0 is now the selected disk.
DISKPART> convert gpt
DiskPart successfully converted the selected disk to GPT format.
DISKPART> create partition efi size=100
DiskPart succeeded in creating the specified partition.
DISKPART> format quick fs=fat32 label="System"
100 percent completed
DiskPart successfully formatted the volume.
DISKPART> assign letter="S"
DiskPart successfully assigned the drive letter or mount point.
DISKPART> create partition msr size=16
DiskPart succeeded in creating the specified partition.
DISKPART> create partition primary size=20490
DiskPart succeeded in creating the specified partition.
DISKPART> format quick fs=ntfs label="Local Disk"
100 percent completed
DiskPart successfully formatted the volume.
DISKPART> assign letter="W"
DiskPart successfully assigned the drive letter or mount point.
DISKPART> create partition primary size=450
DiskPart succeeded in creating the specified partition.
DISKPART> format quick fs=ntfs label="Recovery"
100 percent completed
DiskPart successfully formatted the volume.
DISKPART> assign letter="K"
DiskPart successfully assigned the drive letter or mount point.
DISKPART> gpt attributes=0x8000000000000001
DiskPart successfully assigned the attributes to the selected GPT partition.
DISKPART> list volume
Volume ### Ltr Label Fs Type Size Status Info
---------- --- ----------- ----- ---------- ------- --------- --------
Volume 0 E CCSA_X64FRE UDF DVD-ROM 4177 MB Healthy
Volume 1 D USB-BOOT FAT32 Removable 7727 MB Healthy
Volume 2 W Local Disk NTFS Partition 20 GB Healthy
Volume 3 S SYSTEM FAT32 Partition 100 MB Healthy Hidden
* Volume 4 K Recovery NTFS Partition 450 MB Healthy
DISKPART> exit
Leaving DiskPart...
-------------------------------------------------------------------------------------------------
X:\windows\system32>dism /Apply-Image /ImageFile:E:\sources\install.wim /Index:1 /ApplyDir:W:\
Deployment Image Servicing and Management tool
Version: 10.0.10240.16384
Applying image
[==========================100.0%==========================]
The operation completed successfully.
X:\windows\system32>W:\Windows\System32\bcdboot W:\Windows /s S:
Boot files successfully created.
X:\windows\system32>md K:\Recovery\WindowsRE
X:\windows\system32>xcopy /h W:\Windows\System32\Recovery\Winre.wim K:\Recovery\WindowsRE\
W:\Windows\System32\Recovery\winre.wim
1 File(s) copied
X:\windows\system32>exit
-----------------------------------------------------------------------------------------------------------
Microsoft Windows [Version 10.0.14393]
(c) 2016 Microsoft Corporation. All rights reserved.
C:\Windows\system32>C:\Windows\System32\Reagentc /Setreimage /Path F:\Recovery\WindowsRE /Target C:\Windows
REAGENTC.EXE: Windows RE is already enabled.
C:\Windows\system32>C:\Windows\System32\Reagentc /Info /Target C:\Windows
Windows Recovery Environment (Windows RE) and system reset configuration
Information:
Windows RE status: Enabled
Windows RE location: \\?\GLOBALROOT\device\harddisk0\partition3\Recovery\WindowsRE
Boot Configuration Data (BCD) identifier: dde66d6b-71a3-11e6-8ec8-9459504122f7
Recovery image location:
Recovery image index: 0
Custom image location:
Custom image index: 0
REAGENTC.EXE: Operation Successful.
C:\Windows\system32>diskpart
Microsoft DiskPart version 10.0.14393.0
Copyright (C) 1999-2013 Microsoft Corporation.
On computer: DESKTOP-QQ853DB
DISKPART> list disk
Disk ### Status Size Free Dyn Gpt
-------- ------------- ------- ------- --- ---
Disk 0 Online 30 GB 10 GB *
DISKPART> select disk 0
Disk 0 is now the selected disk.
DISKPART> list volume
Volume ### Ltr Label Fs Type Size Status Info
---------- --- ----------- ----- ---------- ------- --------- --------
Volume 0 D DVD-ROM 0 B No Media
Volume 1 C Local Disk NTFS Partition 20 GB Healthy Boot
Volume 2 SYSTEM FAT32 Partition 100 MB Healthy System
Volume 3 F Recovery NTFS Partition 450 MB Healthy Hidden
DISKPART> select volume 3
Volume 3 is the selected volume.
DISKPART> set id="de94bba4-06d1-4d40-a16a-bfd50179d6ac"
DiskPart successfully set the partition ID.
DISKPART> Remove
DiskPart successfully removed the drive letter or mount point.
DISKPART> list volume
Volume ### Ltr Label Fs Type Size Status Info
---------- --- ----------- ----- ---------- ------- --------- --------
Volume 0 D DVD-ROM 0 B No Media
Volume 1 C Local Disk NTFS Partition 20 GB Healthy Boot
Volume 2 SYSTEM FAT32 Partition 100 MB Healthy System
Volume 3 Recovery NTFS Partition 450 MB Healthy Hidden
DISKPART> exit
Leaving DiskPart...
C:\Windows\system32>exit
Đang viết.........
Không có nhận xét nào:
Đăng nhận xét